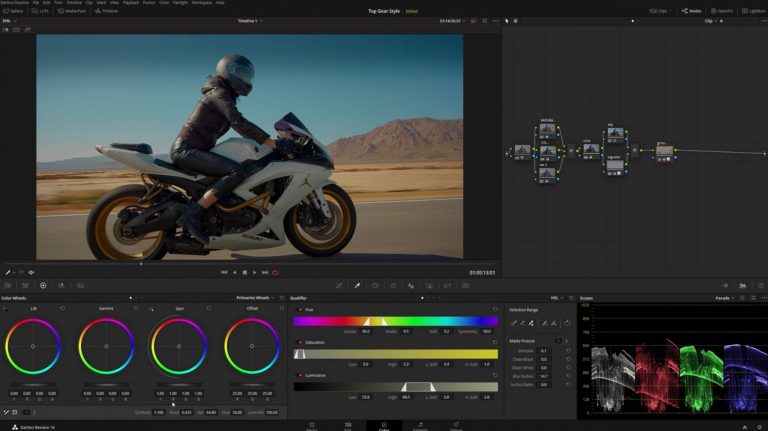
In collaboration with Youtuber AramK, we bring you a series of Davinci Resolve 16 tutorials to help you get your video project off the ground.
In this DaVinci Resolve tutorial, AramK talks about how to recreate that Top Gear look with color grading. The iconic hit TV show is filled with chrome-esque gradients, crunchiness, and plenty of action.
Pro tip: it doesn’t matter what camera you shoot on (as long as it is shot correctly) because you can always color grade it. Shoot it right on camera, and you can edit it later.
AramK uses two different clips of a motorcycle rider cruising down a desert highway. The DaVinci Resolve color grade settings are changed first: color science is set to IPP2, color space is set to REDWideGamutRGB, decode is set to clip, and gamma curve is set to Log3G10.
Next, create a new node and convert it to parallel. This is to ensure the least destructive process when color grading. This node will be for saturation, and its parallel will be for contrast. In the saturation node, you just bump up the saturation. In the contrast node, you can simply bump up the contrast or use offset.
In the scopes pane, watch out for compression. We don’t want it to be compressing or crushing any shadows. Be sure to use pivot to counter the compression. If things still don’t look right, try resetting the settings or just stretching out the highlights and shadows manually. That way, you preserve the most amount of data. You don’t want to compress anything from the beginning of the color gradient.
Watch out for chroma noise, which is typical with RED cameras. It looks unnatural and is present even without color grading. To handle this, go to motion effect and bump up the chroma setting. This should make it appear more natural.
Now, it is time to work on the sky. In the curves setting, use hue vs. saturation. Tap on the blue color and stretch the curve to make it look softer. Now, use hue vs. hue and select the blue in the sky. Go to curves and bump it up a bit, feather it, and then create another parallel to add a vignette.
Use the same technique to edit the ground (minus the vignette). You can also add luminosity, a film grain, and more to achieve that Top Gear style.
Keep watching the video to see the end result of this Top Gear color grading look in DaVinci Resolve!
Looking for a particular topic?
- Begin – 0:35
- Color settings – 1:13
- Create new node – 1:98
- Working with saturation – 2:55
- Working with contrast – 3:20
- Compression – 3:29
- Chroma noise – 4:52
- Top Gear stylized look – 6:06
- Editing the sky – 7:00
- Adding a vignette – 8:22
- Editing the ground – 10:00
- Editing noise – 10:45
- Adding qualifier – 11:50
- Fixing vignette – 14:10
- Tracking – 15:20
- Playback – 16:20
- Film grain – 16:52
Key Takeaways
It does not matter what camera you use as long as you shoot the film correctly. You can always go back and color grade it.
The Top Gear color style is very dusty, crunchy, and filled with deep black tones.
Always work in parallel nodes to ensure the least destructive color grading process.
Watch out for compression of highlights & shadows, and also be cautious of chroma noise. These two issues can be easily edited out.
Resources
- Download the free version of DaVinci Resolve 16.
- Free Rawfilm stock footage shot on RED cinema cameras.
Thanks for reading/watching! We will see you soon with another killer DaVinci Resolve tutorial.

